
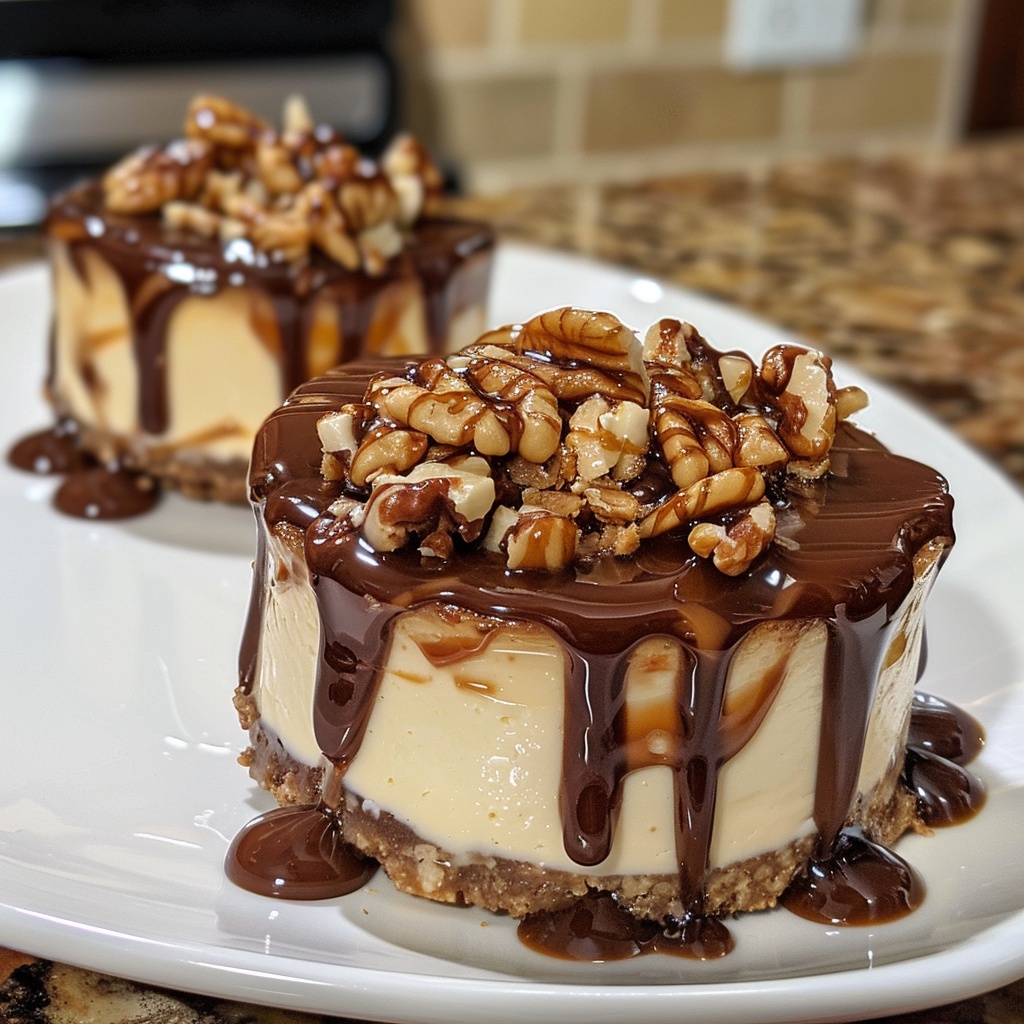
Decadent No Bake Turtle Mini Cheesecakes with Caramel and Pecans
Ingredients:
For the Crust:
- 1 1/2 cups graham cracker crumbs
- 1/4 cup granulated sugar
- 1/3 cup unsalted butter, melted
For the Cheesecake Filling:
- 16 ounces cream cheese, softened
- 1/2 cup powdered sugar
- 1 teaspoon vanilla extract
- 1/4 cup caramel sauce, plus extra for drizzling
- 1/4 cup chopped pecans, plus extra for garnish
- 1/2 cup whipped cream or whipped topping
Directions:
- In a mixing bowl, combine the graham cracker crumbs, granulated sugar, and melted butter until well combined.
- Press the crumb mixture firmly into the bottom of each cup in a mini cheesecake pan or muffin tin, forming the crust. Chill in the refrigerator while preparing the filling.
- In another mixing bowl, beat the softened cream cheese until smooth and creamy.
- Add the powdered sugar and vanilla extract, and beat until well combined.
- Gradually add the caramel sauce to the cream cheese mixture, beating until smooth and fully incorporated.
- Gently fold in the chopped pecans and whipped cream until evenly distributed throughout the filling.
- Spoon the cheesecake filling over the chilled crusts in the mini cheesecake pan or muffin tin, filling each cup almost to the top.
- Smooth the tops with a spatula or the back of a spoon.
- Refrigerate the mini cheesecakes for at least 2 hours, or until set.
- Once set, remove the mini cheesecakes from the pan or muffin tin.
- Drizzle each mini cheesecake with additional caramel sauce and sprinkle with chopped pecans for garnish.
- Serve chilled and enjoy these decadent turtle cheesecake bites!
- Prep Time: 20 minutes | Chilling Time: 2 hours | Total Time: 2 hours 20 minutes
- Kcal: 180 kcal | Servings: 12 mini cheesecakes
FAQs:
- What ingredients do I need to make No Bake Turtle Mini Cheesecakes?
- To make No Bake Turtle Mini Cheesecakes, you will need graham cracker crumbs or crushed chocolate cookies for the crust, melted butter, cream cheese, powdered sugar, vanilla extract, heavy whipping cream, caramel sauce, chocolate chips, heavy cream (for ganache), and chopped pecans. Optional ingredients include additional caramel and chocolate for drizzling on top.
- How do I prepare the crust for the mini cheesecakes?
- To prepare the crust, mix graham cracker crumbs or crushed chocolate cookies with melted butter until the mixture resembles wet sand. Press the mixture firmly into the bottoms of a lined muffin tin or mini cheesecake pan to form an even layer. Place the crusts in the refrigerator to set while you prepare the cheesecake filling.
- How do I make the cheesecake filling for No Bake Turtle Mini Cheesecakes?
- To make the filling, beat the softened cream cheese, powdered sugar, and vanilla extract together until smooth and creamy. In a separate bowl, whip the heavy cream until stiff peaks form. Gently fold the whipped cream into the cream cheese mixture until well combined. Spoon the filling over the prepared crusts, smoothing the tops with a spatula. Chill the cheesecakes in the refrigerator for at least 3-4 hours, or until firm.
- How do I add the turtle toppings to the mini cheesecakes?
- To add the turtle toppings, drizzle caramel sauce over the chilled cheesecakes, followed by a drizzle of chocolate ganache (made by melting chocolate chips with heavy cream). Sprinkle chopped pecans on top of the caramel and chocolate. For an extra touch, you can add additional drizzles of caramel and chocolate on top of the pecans.
- How should I store No Bake Turtle Mini Cheesecakes, and how long do they last?
- Store No Bake Turtle Mini Cheesecakes in an airtight container in the refrigerator for up to 5 days. They can also be frozen for longer storage. To freeze, place the cheesecakes in a single layer on a baking sheet and freeze until solid. Once frozen, transfer them to a freezer-safe container or bag. Thaw in the refrigerator before serving. If freezing, it’s best to add the turtle toppings just before serving for the best texture and presentation.